Supply & Demand
Learn how supply and demand zones reveal institutional activity and high-probability reaction areas.

Supply & Demand
- Mark higher timeframe zones first
- Wait for confirmation before entry
- Trade reactions, not guesses
- Combine with structure and liquidity
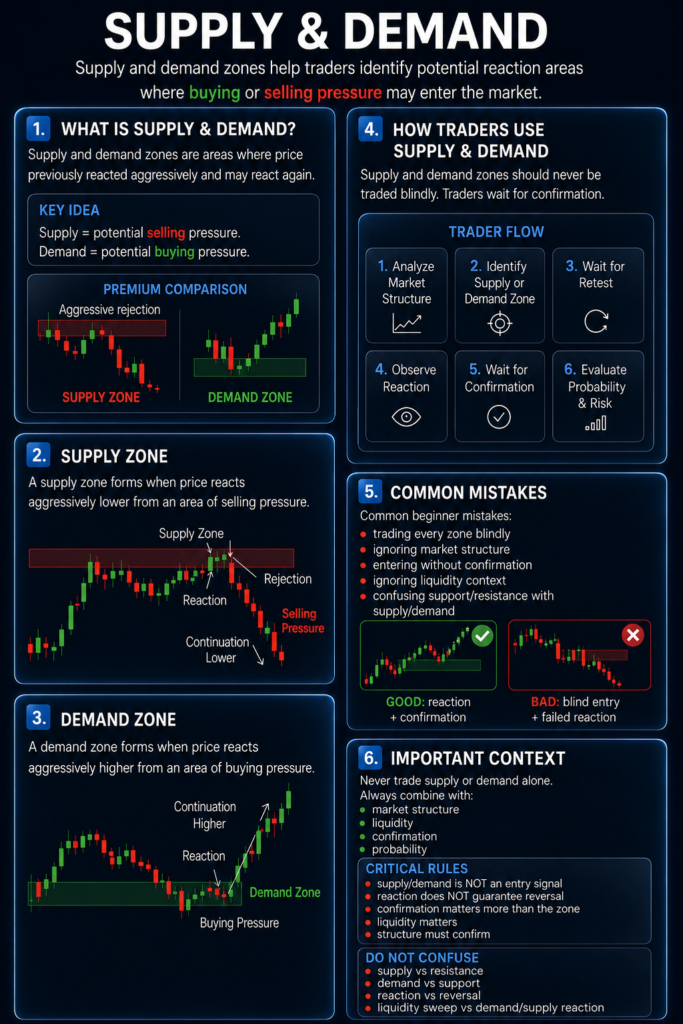
Supply and Demand zones are areas where large buyers or sellers likely entered the market. Price often reacts strongly when it revisits these zones.
Demand zones often create buying reactions. Supply zones often create selling reactions.
What Is Demand
Demand is a zone where buying pressure absorbs selling pressure.
- Price refuses to make new lows
- Strong bullish move leaves the zone
- Buyers step in aggressively
- Price often reacts strongly on return
Strong demand zones often create continuation or reversals.
What Is Supply
Supply is a zone where selling pressure absorbs buying pressure.
- Price struggles to make higher highs
- Strong bearish move leaves the zone
- Sellers step in aggressively
- Price often rejects quickly on retest
Strong supply zones often stop price expansion and create downside reactions.
How To Use Supply & Demand
Higher timeframe zones often control lower timeframe movement.
- Mark key zones on higher timeframes
- Wait for price to revisit the area
- Look for confirmation before entering
- Combine with BOS, CHoCH or liquidity sweeps
Strong zones work best when confirmation exists.
Confluence Framework
Strong zones usually show multiple signs of confirmation.
Zone Logic:
Reaction + Displacement + Structure = Strong zone
- Reaction shows active buyers or sellers
- Displacement shows aggressive movement
- Structure confirms directional intent
The more confluence around the zone, the higher the probability of reaction.
Common Mistakes
- Trading zones without confirmation
- Forcing zones where none exist
- Ignoring higher timeframe direction
- Entering in the middle of a range
No confirmation often means no trade.
Quick Recap
- Demand = buy interest
- Supply = sell interest
- Higher timeframe zones matter most
- Confirmation improves entries
- Structure and liquidity improve accuracy
- Strong supply and demand zones usually form near structure shifts and liquidity.